DIY UV DTF Transfer opens a vibrant, durable pathway for apparel and craft projects, combining the flexibility of direct-to-film with the precision of UV-curable inks. This introductory guide walks you through essential tools, core steps, and the foundation you need to get reliable results with DTF transfer, UV DTF printing, and the right heat press settings. By detailing workflow choices, material considerations, and troubleshooting DTF strategies, the article helps you avoid common misfires and achieve consistent color on a range of fabrics. You’ll discover how DTF ink curing, powder adhesion, and curing lamp or hot-press timing work together to lock in vibrancy and a soft hand. With practical demonstrations, checklists, and clear safety tips, this introduction sets the stage for confident, repeatable DIY UV DTF Transfer projects.
From a semantic perspective, this method can be described as a UV-curable film transfer to fabric, or simply a UV DTF workflow that uses a white base and adhesive powder to bond graphics to textiles. Rather than traditional screen printing or sublimation, the process relies on a transfer sheet, heat, and careful curing to achieve sharp detail and durable adhesion. Key components—substrate compatibility, adhesive powders, printer inks, and curing lamps—map cleanly to related terms such as DTF transfer, UV printing, and ink curing, helping readers connect new steps to familiar concepts. Framing the technique with these LSI-inspired terms helps readers understand workflow, troubleshoot issues more quickly, and navigate the learning curve with confidence.
DIY UV DTF Transfer Essentials: Tools, Materials, and Setup
Starting a DIY UV DTF Transfer project requires a reliable setup. Gather a UV-curable DTF printer or a UV-capable DTF system, white base ink, color inks, and a UV transfer film designed for DTF workflows. The adhesive powder and a curing source (UV lamp) are essential to create a stable transfer sheet that releases cleanly under heat. Keeping your heat press ready with even platen temperature control and a silicone sheet will improve consistency across batches.
Organizing your workspace with lint-free wipes, squeegee tools, and precise alignment aids helps you reproduce exact placements, a key part of successful DTF transfer operations. As you plan, remember that these components tie directly into the broader UV DTF printing workflow, where ink curing and film compatibility determine color fidelity and durability. Investing time to choose reliable materials reduces troubleshooting DTF later in the project.
Understanding UV DTF Printing vs Traditional DTF: What to Expect
UV DTF printing introduces a different curing dynamic compared to traditional DTF. The UV-curable inks harden quickly under light, improving color fastness and reducing post-print handling. This means you can achieve bold graphics on a range of fabrics while keeping the white base ink strategy intact for dark fabrics, and it highlights the relationship between UV DTF printing and the film’s adhesive behavior during transfer.
In practice, understanding the contrast with standard DTF helps you plan color palettes and substrate compatibility. UV curing can shorten overall production time, but you must verify ink curing and film compatibility—key factors that influence whether a project requires adjustments in heat press settings or dwell time for optimal results. The goal is reliable transfer quality with consistent results across runs, a core aim of any DTF transfer workflow.
Optimizing Heat Press Settings for Durable DTF Transfers
To maximize durability in DTF transfers, calibrate heat press settings with attention to temperature, pressure, and timing. Start near the recommended range for UV DTF printing and adjust based on fabric type and ink behavior. Consistent platen temperature and even pressure help prevent edge artifacts and ensure the DTF transfer adheres cleanly without scorching, especially when using silicone sheets and parchment as protective layers.
Keep a log of heat press settings for each fabric and ink set. Testing with representative swatches allows you to refine dwell time and pressure before committing to a full run. Getting these heat press settings right is a practical bridge between UV inks, powder curing, and successful transfer, reducing troubleshooting DTF later in production and increasing repeatability.
Choosing Substrates and Inks for UV DTF Printing on Fabrics
Substrate choice dramatically impacts color vibrancy and durability in UV DTF printing. Natural fibers like cotton tend to yield bright results, while blends may require adjustments in heat and dwell time to avoid gloss or edge artifacts. When selecting substrates, verify compatibility with your adhesive powder and UV inks to ensure reliable DTF transfer on dark and light fabrics alike.
Select a transfer film designed for UV DTF inks to minimize ghosting and preserve color fidelity. Pair this with a compatible powder and ink set, then verify the ink curing behavior on sample fabrics. Understanding how substrate, film, and ink interact under heat press conditions is central to the DTF transfer process and reduces troubleshooting DTF later in development.
Step-by-Step Printing and Curing: From Film to Fabric
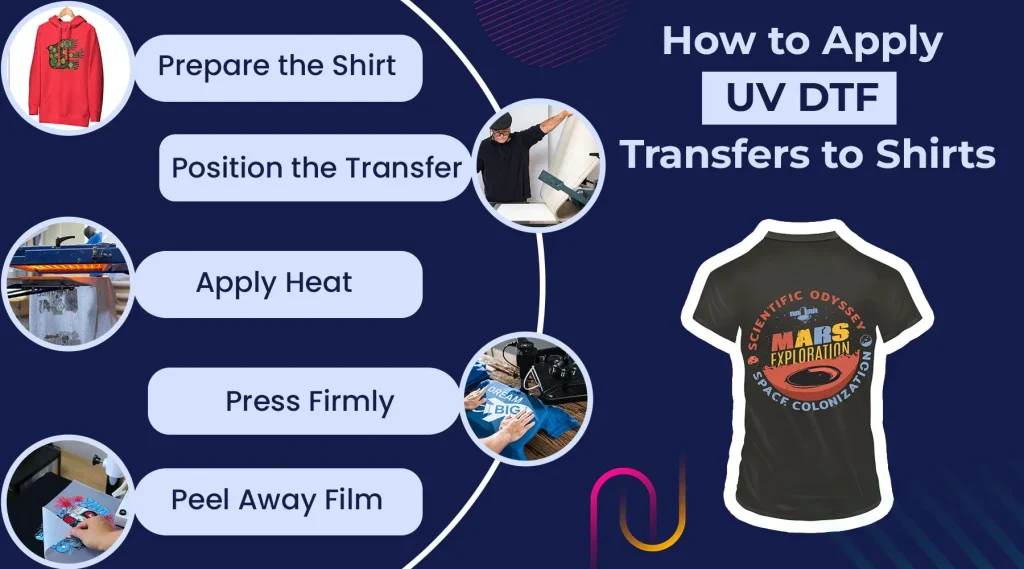
From artwork to finished garment, this step-by-step approach keeps you aligned with the DTF transfer workflow. Prepare artwork with correct sizing and color space, then print onto the transfer film using UV inks tuned for your printer. After applying powder and curing, position the film on the garment and begin a controlled heat press transfer, following the recommended dwell time for UV DTF printing and ensuring even pressure.
Post-transfer care matters for long-lasting results. Allow the print to cool flat before removing the transfer film and follow fabric care guidelines to preserve color fidelity. Document each run, noting ink curing behavior, powder thickness, and heat press settings, so future projects benefit from existing data and fewer troubleshooting DTF challenges.
Troubleshooting DTF: Common Issues and Practical Fixes
Troubleshooting DTF is an ongoing part of refining a DIY UV DTF Transfer project. Common issues like faded whites, ghosting, or color shifts can usually be traced to ink curing, powder coverage, or heat distribution. Start by inspecting the white underlay density, ensure a proper cure, and verify film compatibility with the chosen UV inks to restore vibrancy quickly.
Next, check for transfer failures by reviewing pressure, time, and alignment. An uneven heat pattern or misaligned garment can cause edge curling or incomplete transfer. Use alignment marks, test swatches, and a controlled production log to identify root causes and apply targeted adjustments to heat press settings, curing steps, and powder application. This disciplined approach makes troubleshooting DTF more predictable and efficient.
Frequently Asked Questions
What is DIY UV DTF Transfer and how does it differ from a traditional DTF transfer?
DIY UV DTF Transfer prints designs onto a UV-curable film with UV inks and then transfers them to fabric using a DTF-style powder adhesive. It leverages UV DTF printing to achieve bright, durable graphics on a range of fabrics, including darks, with potentially shorter cure times. Compared to traditional DTF, UV curing can improve color fidelity and reduce post-print handling if you follow proper curing steps.
What heat press settings should I start with for DIY UV DTF Transfer?
Begin with a heat press temperature around 305–320°F (150–160°C) and a dwell time of 12–20 seconds, using even, medium‑high pressure. Adjust slightly based on fabric type and ink behavior, and always use a protective silicone sheet. These heat press settings are a solid starting point for reliable transfers in DIY UV DTF projects.
How can I troubleshoot common issues with DIY UV DTF Transfer (troubleshooting DTF)?
Common issues include faded colors, powder not sticking, ghosting, or edge curling. Troubleshoot by verifying proper ink curing, ensuring an even, uniform powder layer, checking heat distribution and dwell time, and reseating the garment to avoid misalignment. Proper troubleshooting aligns with best practices for DIY UV DTF Transfer and helps maintain transfer quality.
Which materials and curing methods work best for UV DTF inks in DIY projects?
Use UV-curable white base ink plus color inks, a UV-compatible transfer film, and a compatible adhesive powder. Cure the powder with a dedicated powder-curing station or oven, and perform UV curing with a UV lamp when possible for best results. DTF ink curing quality is critical for color fidelity and reliable transfers in DIY UV DTF projects.
How can I ensure color accuracy and solid white coverage on dark fabrics with DIY UV DTF Transfer?
Ensure a solid white base under dark fabrics and calibrate color profiles (ICC) to match screen outputs. Print with white ink coverage sufficient for the fabric, and consider a second pass if needed for even whiteness. Color accuracy also benefits from testing on scrap fabric and using appropriate settings during UV DTF printing.
What is the recommended step-by-step workflow from printing to transfer for a DIY UV DTF Transfer project?
Prepare artwork and set up your printer for UV inks, then print the design onto the UV transfer film with a white base where needed. Apply the adhesive powder, cure it, align the transfer on the garment, and transfer with the heat press using consistent heat, pressure, and time. After transfer, allow cooling and follow fabric care guidelines to preserve vibrant color and adhesion.
| Section | Key Points |
|---|---|
| Overview | DIY UV DTF Transfer blends DTF with UV-curable inks to print on transfer film and then onto fabric using adhesive powder and heat; supports high-res color vibrancy on cotton, blends, and some synthetics; UV curing can speed up workflow and improve color fidelity. |
| Advantages | Bright colors on multiple fabrics; straightforward workflow with scalable batch capability; potential for shorter cure times with UV inks; works with white ink base for dark fabrics. |
| Tools & Materials | UV-capable DTF printer (or standard DTF with UV inks); white base ink; full-color UV inks; UV transfer film; adhesive powder; curing source (UV lamp or oven); heat press; silicone sheet; protective sheets; cleaning supplies; PPE. |
| Substrates & Material Selection | Cotton and cotton blends are typically best; some poly blends may require heat adjustments; test swatches; verify compatibility with adhesive powder and ink. |
| Precise Settings | Resolution 600×600 dpi or higher; ensure solid white base where needed; calibrate color profiles (ICC if available); apply a thin, uniform adhesive powder; follow UV curing times if using UV; heat press 150–160°C (305–320°F), 12–20 seconds; allow cooldown. |
| Printing & Transfer Steps | Prepare artwork; print onto transfer film with UV inks; apply and cure adhesive powder; align garment with transfer; heat press at recommended temp/time with even pressure; peel according to film guidelines; allow to cool before handling. |
| Curing & Transfer Details | If using UV inks, cure with calibrated lamp; powder curing can also be used; document each run; ensure even heat and proper dwell times; UV cure may lock color and bond more robustly. |
| Troubleshooting | Faded colors: check white underlay and cure; Powder not sticking: re-spread powder and cure; Ghosting: ensure even heat/pressure; Edges curling: reduce heat/pressure; Color shifts: recalibrate color profile; White ink gaps: increase coverage or second pass. |
| Tips for Consistency | Do test runs with swatches; use alignment aids; maintain equipment; document each run for future reference and batch consistency. |
| Safety & Maintenance | Work in a vented area; wear gloves when handling inks/powders; regular equipment inspection; keep spare parts and consumables; clean print heads and heat press platen; ensure proper storage of powders and films. |
| Conclusion | DIY UV DTF Transfer offers a practical route to vibrant, durable graphics on fabric without a large studio. By selecting the right tools, aligning settings with your material and ink specifications, and applying thoughtful troubleshooting, you can achieve professional-looking results while maintaining color fidelity and print integrity. |
Summary
DIY UV DTF Transfer offers a practical route to vibrant, durable graphics on fabric without the need for complex silkscreen setups. This descriptive overview highlights how combining UV-curable inks with the DTF transfer process can deliver high-resolution prints across cotton, blends, and select synthetics, with a workflow that emphasizes testing, documentation, and repeatable settings. By selecting compatible printers, films, powders, and heat-press parameters, crafters can reduce waste, shorten curing times, and achieve consistent results—from artwork preparation to final washes. With attention to material compatibility, precise temperature and dwell settings, and a simple troubleshooting routine, DIY UV DTF Transfer enables scalable production for personal projects and small businesses while maintaining color fidelity and print integrity.