DTF printing artwork prep is the hidden backbone of successful direct-to-fabric projects, turning bold ideas into repeatable, vibrant transfers on a wide range of fabrics, from basic tees to performance textiles, with consistent hand feel and color fidelity. By following DTF print file preparation tips, designers align their artwork with printer capabilities, choose appropriate file formats, manage resolution, and anticipate substrate variability to ensure color accuracy and sharp edge definition across diverse runs. This guide covers DTF transfer artwork guidelines, explains vector vs raster DTF artwork choices for scalable logos and photographic textures, and outlines DTF printing color management and DTF design setup best practices to standardize workflows. From choosing reliable source files to establishing robust color profiles, bleed, layering, and safe margins, these steps help reduce reprints, save material costs, and shorten production cycles while maintaining consistency across crews and machines. Applying these practices leads to reliable, high-quality transfers that look vibrant in proofs, translate well to batch runs, and build trust with clients who expect durable, accurate results.
In LSI terms, the same idea can be described as textile print prepress or fabric transfer design preparation, a structured workflow for garment decoration. It centers on prepping digital artwork for textile printers, aligning color data with substrate profiles, and setting up layered artwork to accommodate white underbase and overprint steps. Other related terms you might encounter include print-ready files, RIP-friendly layouts, and scalable vector and raster elements that preserve fidelity across sizes. By framing the topic with these alternative terms, you can optimize content for search intent while keeping the focus on practical, production-ready techniques.
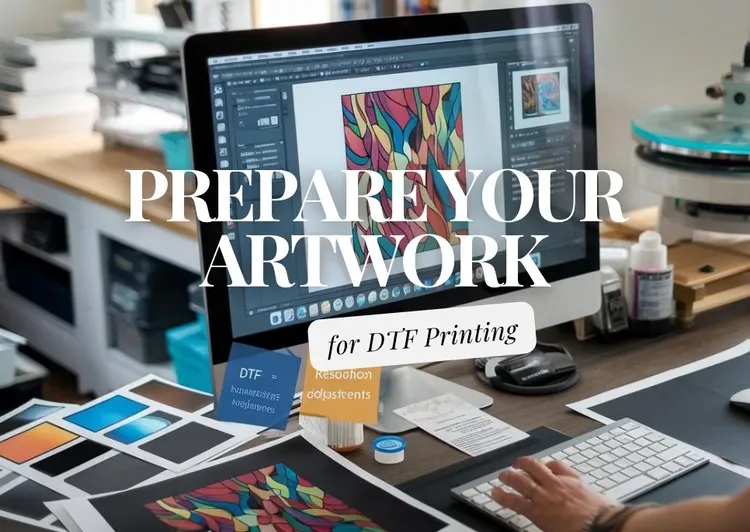
Understanding the scope of DTF printing artwork prep
DTF printing artwork prep encompasses more than a single file adjustment; it’s a holistic workflow that spans file formats, resolution, color management, and layout decisions. By approaching prep with a clear plan, you help ensure the printer can faithfully reproduce the design on fabric, reducing reprints, material waste, and production delays.
To achieve consistent results, standardize file preparation practices and maintain a repeatable workflow for every design. This alignment mirrors the goals of DTF print file preparation tips and DTF transfer artwork guidelines, setting a solid foundation for scalable production and reliable transfers across multiple fabrics and templates.
DTF print file formats and resolution: setting up the source files for crisp transfers
The starting point is selecting reliable source files and choosing a practical resolution. For raster artwork, 300 PPI at the final print size is a common baseline that preserves detail while considering the printer’s RGB/CMYK handling and any white underbase layer.
When transparency is part of the design, PNG remains a strong choice for raster imports to preserve alpha channels without background flattening. For vectors, aim for a high-quality raster export (e.g., 300 PPI) or a clean, scalable vector workflow, remembering that final DTF output often relies on raster data with proper rasterization—an important consideration in DTF print file preparation tips and DTF transfer artwork guidelines.
DTF printing color management: profiles, calibration, and proofing
Color management is foundational to DTF success. The goal is to minimize color shifts between screen, artwork, and the final transfer by adopting a standardized workflow tailored to your printer and substrate.
Key steps include selecting a target color profile (such as sRGB for screen-to-print workflows or a printer-specific CMYK profile when available), calibrating monitors, and soft-proofing designs. Validate color separations for spot colors or special inks, and maintain consistent color management across all files to avoid surprises during production, aligning with DTF printing color management and DTF transfer artwork guidelines.
DTF design setup best practices: organizing layers, bleed, and alignment
Design setup is the backbone of repeatable DTF results. A well-structured file that separates base colors, overlays, and the white underbase simplifies RIP processing and ensures consistent outcomes across runs.
Practical setup includes maintaining clear bleed margins, ensuring high-contrast separations where needed, and placing critical elements away from trim areas. Use alignment marks and reference guides to reproduce placement accurately, and flatten only after verification while preserving a non-destructive version for future edits—embodying DTF design setup best practices and supporting smooth production flows.
Vector vs raster DTF artwork: choosing the right approach
Understanding when to use vector versus raster is a common question in DTF artwork prep. Vectors excel for logos and typography with sharp edges, especially when scaling across multiple sizes is required.
Raster images are essential for photographs or textures with subtle color variation. When combining vector art with raster textures, ensure the raster layer is rasterized at an appropriate resolution to avoid banding or blurring in the final transfer. If you must rasterize vector elements, keep the output large enough to prevent pixelation during RIP processing, reflecting practical guidance for vector vs raster DTF artwork.
Bleed, margins, and artwork alignment for reliable DTF transfers
Bleed management is critical to prevent white borders and misalignment after transfer. Plan artwork with safe margins and clear alignment guides to ensure a clean, edge-to-edge appearance on fabric.
Practical tips include adding a bleed of 0.125–0.25 inches (3–6 mm) beyond final print edges when designs approach the edge, keeping text within safe margins, and using alignment marks to reproduce consistent placements. Maintain a reference guide within the file to help operators during production, a best-practice approach aligned with DTF transfer artwork guidelines and the broader tips from DTF print file preparation tips.
Frequently Asked Questions
What is DTF printing artwork prep and why is it essential for high-quality transfers?
DTF printing artwork prep is the holistic process of turning a design into a print-ready file. By following DTF print file preparation tips—such as final artwork at 300 PPI, using PNG or TIFF for transparency, converting text to outlines, and applying the printer’s color profile—you improve color accuracy, edge detail, and production efficiency, resulting in stronger, shop-ready transfers.
How do DTF transfer artwork guidelines influence your file setup during DTF printing artwork prep?
DTF transfer artwork guidelines emphasize a clean, layered file structure (base colors, overlays, and white underbase), proper bleed and safe margins, and clear alignment marks. When paired with solid color management (monitor calibration, soft-proofing, and ICC profiles), these guidelines reduce misregistration, color shifts, and reprints.
When should you use vector vs raster DTF artwork in the prep process, and how does that choice impact DTF printing artwork prep?
Use vector art for logos and typography that must stay sharp at any size, and raster art for photos and textures that require detailed color. For DTF artwork prep, export vectors with clean edges and rasterize to 300 PPI at the final print size when needed; if mixing vector and raster elements, rasterize the vector parts at a sufficient resolution to avoid blur in RIP processing.
What role does DTF printing color management play in DTF printing artwork prep?
Color management is foundational: choose a target color profile (SRGB for screen-to-print or a printer-specific CMYK profile if available), calibrate monitors, and soft-proof designs. Validate color separations when using spot colors or a white underbase, and maintain a consistent color workflow across all files to minimize surprises in production.
What are DTF design setup best practices to optimize DTF printing artwork prep?
DTF design setup best practices include organizing artwork into logical layers (base colors, overlays, and white underbase), using high-contrast separations where needed, adding a bleed (0.125 inches / 3 mm), keeping critical elements inside safe margins, and including alignment guides. Flatten the image only after verification and keep a non-destructive version for future edits.
How can you implement a practical workflow that follows DTF design setup best practices in DTF printing artwork prep?
Adopt a repeatable, 12-step workflow: confirm design intent and final size; prepare layered files (base colors, overlays, white underbase); convert text to outlines or rasterize; export raster assets at 300 PPI; apply bleed and safe margins; apply color management and soft-proof; verify vector edges; handle transparency; name files consistently; run a test print; adjust as needed; finalize and document for future projects. This approach aligns with standard DTF print file preparation tips and DTF transfer artwork guidelines, delivering consistent, high-quality DTF transfers.
| Aspect | Key Points |
|---|---|
| Introduction / Overview | DTF printing offers vibrant colors, soft hand-feel, and flexible application on many fabrics. Artwork prep differentiates punchy prints from disappointing results and affects color accuracy, edge detail, and durability; goal is a print-ready file to reproduce faithfully. |
| Scope of DTF artwork prep | Holistic process from file formats to color profiles and layout; planning reduces reprints, saves materials, and shortens cycles; standardize tips and use a repeatable workflow for every design. |
| File formats and resolution | Raster at 300 PPI final size; manage RGB/CMYK handling and white underbase; PNG preserves transparency. For vectors, export to high-quality PNG at 300 PPI or rasterize appropriately. Convert text to outlines to avoid font substitution. Keep file sizes manageable. |
| Color management and profiles | Standardized workflow; target color profiles (sRGB or printer-specific CMYK); adjust for white underbase; calibrate monitor and soft-proof; validate color separations; maintain consistent color management across files. |
| Design setup and layering | Organize layers: base colors, overlays, and white underbase; use high-contrast separations; include 0.125 inch bleed; keep critical elements away from edges; flatten after verification and keep a non-destructive version. |
| Vector vs raster in DTF | Vectors for logos and crisp text; convert to outlines if needed. Raster images for photos/ textures; aim for 300 PPI final. When combining, rasterize vectors cleanly and output at large enough resolution to prevent pixelation. |
| Bleed, margins, and alignment | Bleed 0.125–0.25 inches; safe margins; include alignment marks; ensure text stays within safe area to avoid cropping. |
| Embedded fonts, image embedding, and file naming | Embed fonts or outlines; keep editable copy; embed or link images as required. Use consistent naming like ProjectName_Size_Colorway_Version (example: FloralDrift_8x10_FullColor_v3). |
| 12-step workflow | From concept to print-ready: confirm design intent/size; prepare layered artwork; convert text; export 300 PPI assets; apply bleed/safe margins; apply color management; validate vectors; handle transparency; save master version; run test print; adjust; finalize for production. |
| Troubleshooting common issues | Color drift: revisit color management and ICC profiles; edge fuzz: check rasterization and outlining; misalignment: verify bleed/margins and alignment marks; perform a dry-run on fabric swatch. |
| Testing, proofing, and pre-production checks | Proof on the same fabric; confirm white underbase prints cleanly beneath colors; document results and adjust color management and layer order as needed. |
| Final tips for reliable transfers | Maintain a standardized workflow and a library of tested settings, color profiles, and bleed values; communicate requirements clearly with the printer operator. |

