The UV DTF transfer production workflow dominates modern garment customization by delivering vivid color and durable finishes at speed. Understanding this workflow from design to delivery helps brands, print shops, and DIY creators achieve consistent results across a range of fabrics. Key considerations include substrate selection for DTF transfers and managing color separations for UV DTF printing. From clean file prep to precise curing, every step aims to minimize waste and reduce reprints through careful roadmap planning. When teams align creative intent with the constraints of the DTF transfer workflow, they can reliably reproduce crisp edges, solid opacity, and wash-fast color.
Seen from another angle, this approach is a digital garment transfer method that uses UV-curable inks printed onto a transfer film and then heat-pressed onto a fabric. In this framing, the focus shifts to ink chemistry, substrate compatibility, and reliable curing, rather than older pigment approaches. The process emphasizes precise color management, opacification on dark textiles through white underprints, and accurate alignment to prevent misregistration. Manufacturing teams describe transfer media, peel strength, and post-print stabilization as part of a streamlined print-to-press workflow. By aligning terminology with related concepts such as dye-sub inspired digital transfers, print finishing, and substrate compatibility, teams can communicate clearly and optimize performance across fabrics.
1. Understanding UV DTF transfer production workflow
At its core, the UV DTF transfer production workflow maps every step from concept to finished product. It begins with a design brief and ends with delivery, but the value lies in the handoffs between design, pre-press, printing, transfer, curing, and final QA. This workflow leverages UV DTF printing technology, using UV-curable inks printed on a transfer medium before being applied to a target substrate. The process offers vibrant color, fine detail, and strong wash durability across a wide range of fabrics, distinguishing it from traditional screen printing or standard heat transfers. A well-defined UV DTF transfer production workflow reduces waste, minimizes reprints, and shortens time-to-market by aligning the capabilities of UV DTF printing with production constraints.
Key to success is cross-functional collaboration. Designers, prepress technicians, press operators, and QA staff all align on substrate choices, ink compatibility, and calibration. The pre-press stage includes file preparation, color management, and ensuring the white underbase layer is placed when needed. With a documented workflow, teams can trace issues back to their sources—whether color shifts, misregistration, or adhesion problems—facilitating continuous improvement. Emphasize consistent color profiles, standardized margins, and mirror imaging where required to reduce misregistration during the UV DTF transfer process. Adopting a structured DTF transfer workflow helps teams scale while maintaining color fidelity and edge definition.
2. Substrate selection for DTF transfers and its impact on durability
Substrate selection for DTF transfers directly influences adhesion, color fidelity, and wash durability. The transfer media must work in harmony with UV-curable inks and the chosen fabric. The ideal films provide clean separation, crisp edges, and reliable peel strength after curing. The substrate’s fiber content, weave, and finish affect how the ink cures under UV light and how well it bonds during heat pressing, making substrate compatibility a central pillar of the UV DTF process.
Consider various blends such as cottons, polyesters, or poly-cottons, and test for opacity with a white underprint when required. Evaluate fabric finishes, pre-treatment needs, and potential for shrinkage or texture that could impact adhesion and edge performance. Engaging with substrate suppliers early helps optimize the overall DTF transfer workflow and ensures you select substrates that deliver durable, high-quality results when combined with UV DTF printing.
3. Designing for UV DTF printing: color, detail, and edge crispness
Designing for UV DTF printing means designing with the capabilities and constraints of UV inks in mind. Designers should plan for strong color separations, solid line work, and halftone patterns that transfer cleanly from the transfer medium to the garment. Prepare artwork at high resolution or in vector formats, ensuring sharp edges translate to the final product. The design phase should also account for a clean white underbase on dark fabrics, edge crispness around small text, and avoidance of extremely tight curves that could bleed or misregister during transfer, thereby maximizing the potential of UV DTF printing.
Incorporate file structure and layer orders that reflect the printer’s workflow, and communicate clearly with production about alignment marks, safe margins, and garment placement. Align design decisions with substrate and ink behavior to minimize guesswork in the print shop. This approach strengthens garment printing with UV DTF and supports consistent, high-fidelity results across batches.
4. The UV DTF transfer process: file prep, color separation, and mirror imaging
The UV DTF transfer process begins with precise file preparation: color separations for UV inks, a possible white underprint layer, and proper margins and bleed. You must also confirm mirror imaging if required by the transfer orientation. Generating accurate separations and ensuring the final print aligns with garment placement are essential to avoid misalignment during transfer. The process is designed to maximize color density, edge definition, and opacity on darker substrates while remaining compatible with the transfer media.
Color management and test prints on transfer media help verify density, edge definition, and potential issues such as banding or ghosting. The UV DTF transfer process benefits from thorough preflight checks, printer calibration, and a controlled curing and bonding routine. When the file is ready, production can proceed with the printing run and then transition to the transfer stage, ensuring the output meets the expected standards of the DT F transfer workflow.
5. Quality control and troubleshooting for garment printing with UV DTF
Quality control for garment printing with UV DTF should be built into every stage: pre-flight checks, color density verification, and print-to-transfer alignment. Use standardized QC checklists to monitor edge integrity, color fidelity, and adhesion after wash cycles. Inspect opacity of the white underbase on dark fabrics and verify even ink deposition across the transfer to prevent uneven color or texture. A rigorous QC program helps catch issues early and preserves long-term durability.
Troubleshooting common issues—color shifts between batches, misregistration on curved seams, or poor adhesion on certain fabrics—requires a methodical approach. Start with file integrity and color profiles, verify transfer media stock, and run a controlled test. If adhesion fails on a given substrate, check the heat press parameters, the translucency of any white underprint, and whether fabric pre-treatment is needed. Small adjustments to curing time, temperature, or pressure can resolve most problems without a full process overhaul and should be captured in the garment printing with UV DTF workflow.
6. Scaling up: optimizing workflow, SOPs, and automation for UV DTF
As demand grows, scaling up requires a robust optimization of the entire DTF transfer workflow. Standardize common design templates, implement batch print runs, and streamline media inventory management to reduce setup times and waste. Automation of file preparation, color separations, and prepress checks can deliver consistent results at higher throughput while preserving color integrity and edge precision.
Invest in operator training, clear standard operating procedures (SOPs), and data tracking of yield, reprint rate, cycle time, and throughput. Regular reviews of workflow metrics guide equipment upgrades and process changes, ensuring the operation remains efficient and scalable. A deliberate focus on continuous improvement within the DTF transfer workflow, while maintaining robust UV DTF printing quality, helps brands and shops meet growing orders without sacrificing quality.
Frequently Asked Questions
What is the UV DTF transfer production workflow and why is it essential for success in garment printing with UV DTF?
The UV DTF transfer production workflow is a structured series of steps from design to delivery that ensures consistent color, sharp edges, and durable adhesion when applying UV DTF transfers. It minimizes defects, reduces waste, speeds time to market, and helps scale production by aligning artwork, media, and substrate requirements. Following this workflow provides predictable results across different fabrics and orders.
How does UV DTF printing fit into the UV DTF transfer production workflow?
UV DTF printing is the imaging stage where UV-curable inks are laid onto the transfer medium with proper color management, white underprint where needed, and mirror imaging if required. It requires careful calibration of ink density, head height, and printer profiles to prevent banding and misregistration and to ensure fidelity on the chosen substrate.
What factors influence substrate selection for DTF transfers in the UV DTF transfer production workflow?
Substrate selection for DTF transfers involves choosing transfer films designed for UV inks and fabrics that respond well to heat curing. Consider adhesion, wash durability, color fidelity, and the fabric’s texture. Early collaboration with media and ink suppliers helps optimize adhesion and performance.
What are the main steps in the step-by-step UV DTF transfer production workflow?
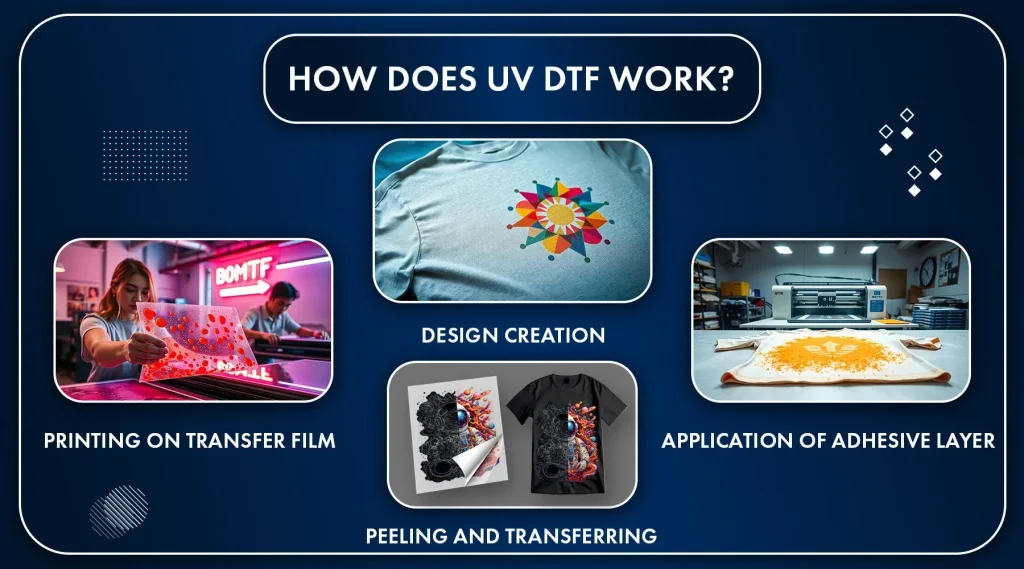
Key steps include: 1) pre-press preparation, 2) design-to-print alignment with mirror and white underbase as needed, 3) UV DTF printing, 4) post-processing on the transfer film, 5) curing/bonding to the substrate, 6) transfer removal and finishing, and 7) quality control.
How can design decisions and file preparation optimize the UV DTF transfer production workflow?
Thoughtful design for UV inks—accurate color separations, crisp lines, halftones, and an appropriate white underprint—minimizes errors in the UV DTF transfer workflow. Clear layer organization, correct resolution, margins, bleed, and proper export formats reduce guesswork and improve color accuracy and edge crispness.
What QC and troubleshooting steps help ensure reliability in the UV DTF transfer production workflow?
Implement a robust QC checklist covering alignment, edge integrity, color fidelity, and wash durability. Regularly calibrate printers, maintain curing lamps, and verify color profiles and file integrity. When issues occur, test on a sample fabric, adjust curing time, temperature, or pressure, and iterate before large-scale runs.
| Section | Key Points | Notes |
|---|---|---|
| Overview / Concept | UV DTF transfers use UV-curable inks printed on a transfer medium, applied with heat to the chosen substrate; they offer vibrant color, fine detail, and strong wash-fastness across fabrics. The production workflow connects design decisions with manufacturing considerations to minimize defects, reduce waste, and speed time to market. | Focal point: the UV DTF transfer production workflow. |
| Design considerations | Design for UV DTF emphasizes color separations, line work, and halftone compatibility; manage color gamut and final fabric; export artwork at high resolution in vector or high-res raster formats; plan for a white underbase on dark fabrics; ensure edge crispness and avoid tight curves to prevent ink bleed or misregistration; promote collaboration between design and production. | Clear design specs reduce printer guesswork and improve transfer quality. |
| File prep & artwork optimization | Prepare color separation, white underprint layer, and clean layer organization; consider mirror imaging if required; scale artwork to garment dimensions; run test prints on transfer media to verify color accuracy and edge definition; align curing parameters with printer and ink chemistry. | A well-structured file setup speeds production and reduces errors. |
| Substrate & ink selection | Choose transfer films designed for UV inks; ensure substrate compatibility for adhesion and wash durability; match ink set to printer, film, and substrate; engage early with ink and media suppliers for optimal adhesion and safety. | Early collaboration improves adhesion, color density, and safety. |
| Step 1: Pre-press preparation | Calibrate printer, load transfer media, verify color profile, and run a test patch before printing. | Pre-press ensures consistent, predictable output. |
| Step 2: Design-to-print alignment | Confirm design is prepared for printing with correct mirror imaging and white underbase placement; save final file in a printer-friendly format. | Proper alignment minimizes rework and misregistration. |
| Step 3: Printing | Execute the UV DTF print run; monitor ink flow, head heights, and speeds for stable color density; watch for banding or misregistration. | Real-time monitoring catches defects early. |
| Step 4: Post-processing on the transfer film | Optional post-print processing to stabilize ink and release air bubbles; ensure even ink deposition on the transfer film. | Prevents defects during transfer. |
| Step 5: Curing / bonding | Cure the transfer with controlled heat and pressure; follow ink/media guidelines to maximize adhesion and wash durability. | Precise parameters are key to durability. |
| Step 6: Transfer removal & finishing | Remove the carrier sheet carefully; inspect the ink–fabric interface; adjust for seams or textures as needed. | Finish with a clean interface for longevity. |
| Step 7: Quality control | Standardized QC checks alignment, edge integrity, color consistency, and wash durability; use checklists and sample testing for continuous improvement. | QC reduces reprints and elevates consistency. |
| Quality control & troubleshooting | Common challenges include color shifts between batches, misregistration on curved surfaces, and adhesion issues. Regular printer calibration, lamp maintenance, and a clean environment support stable results; troubleshoot by validating files, media, and re-running tests; adjust curing time, temperature, or pressure as needed. | A structured QC approach helps identify recurring issues early. |
| Optimizing for efficiency & scalability | Standardize templates for designs, consolidate media inventory, and automate file preparation where possible. Use batch print runs with consistent substrate choices to reduce setup times; invest in training and SOPs; monitor yield, reprint rate, and cycle time for improvements. | Automation and training drive scalable production. |
| Real-world case study highlights | Case: a Summer Capsule with bold typography and photography showed vivid color, sharp edges, and good fabric compatibility across cotton and poly-blends; white underprint on dark fabrics boosted opacity; standardized the process from file prep to post-press QC, delivering on time with a low reprint rate. | Illustrates practical benefits of a defined UV DTF workflow. |
| What to watch for in implementation | Maintain strong design–production communication; keep an up-to-date substrate/media library with documented results; use reliable UV-curable inks and calibration equipment; develop a clear QC checklist; run small pilot batches to identify bottlenecks early. | Foundation for smooth deployment and scaling. |
Summary
UV DTF transfer production workflow is the backbone of reliable, high-quality transfers that perform across a wide range of fabrics. By integrating thoughtful design, meticulous file preparation, careful substrate and ink selection, and rigorous quality control into a cohesive, scalable process, teams can transform creative concepts into durable, vibrant finished products. From concept to client delivery, the UV DTF transfer production workflow reduces risk, speeds time to market, and supports growth for brands and print shops alike. Ongoing optimization and cross-functional collaboration will be evident in every batch through consistent color, sharp detail, and lasting print quality.

