DTF Printing Mistakes can undermine even carefully planned apparel projects, turning vibrant transfers into dull, misaligned results that disappoint clients and end up back on the bench. To prevent DTF printing mistakes to avoid, designers should test designs on real garments, consider substrate color and texture, and anticipate how raised stitching or seams will influence placement and edge integrity across sizes. This is where the DTF transfers troubleshooting mindset comes into play, guiding you to verify film quality, adhesive compatibility, powder distribution, and curing windows before committing to a full production batch. By following DTF print quality tips such as validating ICC profiles, using test strips, and maintaining consistent printer maintenance, you can sharpen color fidelity, improve edge definition, and boost wash-fastness. Adopting direct-to-film printing best practices and aiming for mastering flawless DTF transfers will reduce waste, speed up rounds, and help you deliver reliable, high-impact results every time.
From an LSI perspective, these issues can be described as film-based transfer missteps or adhesion challenges that undermine the final garment. Other terms that capture the same idea include transfer quality problems, substrate compatibility hurdles, and color consistency gaps, which helps broaden search relevance without repeating the same phrase. Addressing design testing, material quality, and consistent heat and timing across fabrics creates a robust foundation for reliable results.
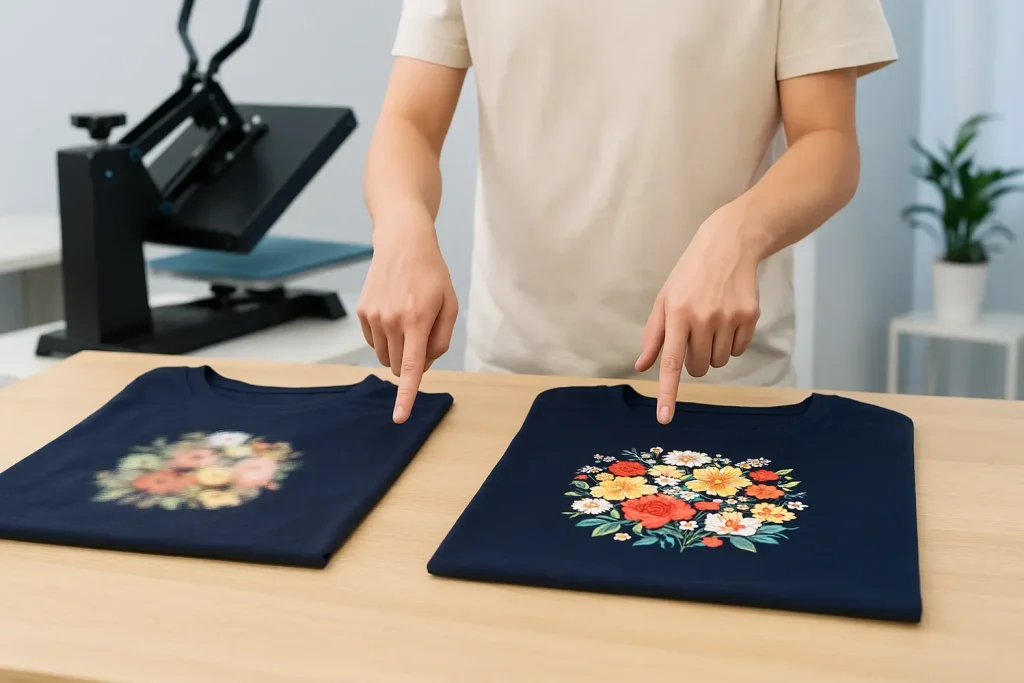
DTF Printing Mistakes to Avoid: Common Design and Substrate Pitfalls
DTF Printing Mistakes often begin at the design stage. Designs that look perfect on a flat screen can drift on a curved garment, shift with fabric stretch, or require excessive bleed to prevent edge ringing on glossy films. To minimize these issues, always design with the garment area in mind, simulate substrate color and texture, and run real-world test prints on the target fabric before committing to a full batch. This proactive testing aligns your artwork with the physical performance of the substrate, reducing waste and rework.
Inappropriate substrate selection is another major obstacle. While DTF transfers can work on many fabrics, blends, weight, and finishes can dramatically affect heat response, adhesive bonding, and color migration. By choosing fabrics with compatible fiber content and finishes and validating adhesive powder strength, film compatibility, and transfer behavior, you prevent color shifts, cracking, or peeling. When in doubt, conduct a controlled test on the exact fabric type to establish reliable transfer performance.
DTF Transfers Troubleshooting: Quick Fixes for Edge, Color, and Adhesion Issues
DTF transfers can reveal issues after the design has been set, particularly around edges, color fidelity, and adhesion. If you notice fuzzy edges or misregistration, re-check alignment marks, film tension, and press parameters. A precise workflow that includes reprinting with corrected alignment and a test piece can save a full run from becoming a costly mistake.
Color-related problems—fading, color shifts, or dull hues—often trace back to color management and printer calibration. Revisit ICC profiles for each substrate, verify ink densities, and perform a test garment check against a color reference before proceeding. Tackling adhesion problems on dark fabrics may require uniform powder distribution, proper curing, and, when needed, a pre-treatment step to improve adhesion and wash durability.
DTF Print Quality Tips: Calibration, Testing, and Consistency
DTF print quality hinges on disciplined calibration and systematic testing. Calibrate printers for each substrate, use calibrated color profiles, and run test strips before burning through production material. These steps help you catch misalignment, color inconsistency, and density errors early, preserving both time and money.
A standardized workflow is essential for repeatable results. Document pre-press duration, heat press settings (temperature, time, and pressure), and curing windows for every fabric type. Regular printer maintenance—cleaning printheads, replacing worn components, and checking film and powder consistency—further reduces variability and supports reliable color reproduction across orders.
Direct-to-Film Printing Best Practices: Equipment, Materials, and Process Consistency
Direct-to-Film Printing best practices emphasize using reliable equipment and quality consumables to reduce variability. Invest in a dependable printer, long-lasting films, and proven adhesive powders, and follow manufacturer guidelines for viscosity, curing temperatures, and application methods. Consistency in supplies translates to predictable results and fewer defects.
Optimize the color workflow with substrate-specific profiles and accurate color management. Start designs with color-managed workflows, convert to the correct color space, and perform a final print check on a sample garment before pressing. Pre-treat when necessary and adhere to fabric-specific protocols to improve adhesion and wash durability, ensuring every job meets client expectations.
Mastering Flawless DTF Transfers: From Pre-Press to Post-Press Finishing
Mastering flawless DTF transfers requires attention to every step, including pre-press and post-press finishing. Pre-press steps should remove moisture and flatten the fabric to ensure even contact, while post-press finishing—cooldown, trimming, and proper removal of protective sheets—helps prevent edge lifting and dull finishes. Consistent post-press routines contribute to durable, high-quality results.
A proactive approach to troubleshooting during finishing reduces rework. Monitor the curing window and verify that pressure is evenly distributed across the platen. By documenting ideal settings for each garment type and conducting wash tests, you can replicate success across batches and steadily improve transfer durability and appearance.
Preventing Misalignment and Registration Errors for Multi-Color Designs
Registration accuracy is critical for multi-color DTF designs. Even small misalignments become noticeable on garments with curves or textures. Ensure the substrate is flat, use reliable alignment systems, and verify registration marks before pressing. A jig or grid can help maintain precise placement and minimize misalignment across color layers.
To avoid recurring issues, incorporate a robust alignment verification step into your standard workflow and re-check alignment after any adjustments. Regularly testing with mock-ups on similar fabrics enables you to tune film tension and printer setup, supporting crisp, vibrant results that align perfectly with your artwork.
Frequently Asked Questions
What are the most common DTF printing mistakes to avoid for flawless transfers?
DTF printing mistakes to avoid often come from skipping real garment testing, choosing the wrong substrate, using low‑quality film or powders, and improper curing or heat press settings. To prevent them, design with the garment in mind and test on the target fabric, verify fabric compatibility, invest in reliable film and adhesive powders, and calibrate color and heat settings for each substrate. Following DTF print quality tips like test strips, color targets, and documented presets helps reproduce consistent results.
How can I use DTF transfers troubleshooting to fix issues with adhesion or color?
DTF transfers troubleshooting starts with diagnosing whether the issue is adhesion, color, or edge sharpness. Then check powder distribution and curing, verify press temperature/pressure/time, inspect film tension, and re-test on a scrap garment before proceeding. Reassess substrate compatibility and printer calibration to prevent repeat problems.
What are the best DTF print quality tips to improve results?
Key DTF print quality tips include using high‑quality film, powders, and inks designed for DTF, calibrating color profiles for each substrate, running test strips and garment tests, maintaining printer hardware, and documenting a standardized workflow so results are repeatable.
What are direct-to-film printing best practices for consistent results?
Direct-to-film printing best practices include investing in reliable equipment and consumables, using substrate‑specific color profiles, optimizing color workflow, pre‑treating fabrics when needed, and maintaining consistent press parameters. Test and document settings for each fabric type to ensure repeatable, high‑quality transfers.
How can mastering flawless DTF transfers help reduce waste and improve consistency?
Mastering flawless DTF transfers means standardizing every step from design to cure, performing real‑garment testing, calibrating color, and following a proven workflow. This reduces misprints, minimizes waste, and delivers repeatable results that meet client expectations.
What checks can help minimize DTF Printing Mistakes in production?
Implement a quality control checklist at every stage: confirm designs with real garments, verify substrate compatibility and film quality, perform printer calibration, run test prints, monitor curing/press parameters, and document results so you can reproduce success and quickly resolve issues in future runs.
| Topic | Key Points |
|---|---|
| Common DTF Printing Mistakes to Avoid | A summary of the eight common mistakes in DTF workflows—design testing, substrate selection, material quality, color management, curing/pressing, powder handling, alignment, and post-press finishing. |
| 1) Designing Without Real-World Testing | Designs can look perfect on screen but may not translate to garments. Test prints on target fabric; consider garment area, substrate color/texture, and allow extra bleed to avoid edge ringing; test before full batch. |
| 2) Inappropriate Substrate Selection | Not all fabrics respond the same. Lightweight cottons or certain synthetics may dye migrate, pill, or poorly adhere. Verify compatibility with fiber content and finish, and run controlled tests on the exact fabric type. |
| 3) Subpar Film, Adhesive, or Powder Quality | Low-quality film or powders can cause scuffing, uneven color transfer, or rough textures. Use reputable supplies and follow manufacturer recommendations for viscosity, curing temperatures, and application. Regular inventory checks help prevent batch-to-batch differences. |
| 4) Inaccurate Print Calibration and Color Management | Color accuracy matters for client satisfaction. Calibrate printers per substrate, use properly calibrated ICC profiles, and perform color targets or test garments to fine-tune ink density and balance. |
| 5) Incorrect Curing, Pre-Press, or Heat Press Parameters | Curing time, temperature, and pressure affect adhesion. If the heat press is too cool, adhesive won’t fuse; too hot can scorch. Use calibration sheets, pre-press to remove moisture, and document ideal settings for each garment type. |
| 6) Poor Powder Application and Handling | Powder quantity and uniform application matter. Too little leaves incomplete coverage; too much causes dull finishes. Ensure uniform distribution, respect curing windows, and test cure on scrap fabric. |
| 7) Misalignment and Registration Errors | Even small misalignments are visible, especially with multi-color designs. Keep the substrate flat, use reliable alignment, verify registration marks, and consider a jig or grid for precise placement. |
| 8) Inadequate Post-Press Finishing | Post-press finishing helps set the transfer and reduces edge peeling. Allow cooldown, trim accurately, and follow wash-test recommendations to ensure durability. |
| DTF Print Quality Tips | – Use high-quality film, powder, and inks; consistency improves predictability. – Calibrate for each substrate with ICC profiles. – Run test strips and a full garment test before large orders. – Maintain printer health and clean components regularly. – Document a standardized workflow and fabric-specific settings. |
| DTF Transfers Troubleshooting | – Adhesion issues on dark fabrics: ensure even powder distribution and adequate cure; re-press on a test piece. – Cracking/peeling after washing: review heat-press settings and adhesive compatibility; adjust curing. – Fading/color shifting: revisit color management and profiles; run a color-check print. – Stiff finishes: reduce powder or curing intensity; test smaller batches. – Blurry edges: re-check alignment and film tension; verify printer resolution. |
| Best Practices for Direct-to-Film Printing | – Invest in reliable equipment and quality consumables. – Use substrate-specific profiles and a color-managed workflow. – Pre-treat fabrics when needed and maintain consistent press parameters. – Log settings and test/document for future runs to ensure repeatability. |
Summary
DTF Printing Mistakes are common but avoidable with a disciplined workflow and careful attention to detail across every step. Flawless transfers come from testing designs on real garments, selecting fabrics with compatible finishes, calibrating color profiles, and upholding precise curing and pressing parameters. By verifying designs with garment testing, choosing appropriate materials, maintaining accurate color management, and following a consistent press routine, you can reduce waste and deliver high‑quality results. Adopt a proactive troubleshooting mindset—test on scraps, document settings, and follow best practices—to turn potential rookie errors into reliable, professional DTF transfers.

